Basics
The D♯ Engine software is licensed for a specific target, which typically is either your own organization’s Data warehouse or the Data warehouse you are building for your customer. In order to work, the D♯ Engine must have a valid license file in its bin folder. The license file contains this target information which is also written to the generated program code, so you will want to use the correct installation and license for the project you are working on.
From version 4.2 license files are handled and distributed with a dedicated license server. For information about installation with older versions, look here.
Installation
To install the D♯ software on your computer, run the installation package that is either downloaded from here, or alternatively provided to you by your D♯ Administrator.
The default installation target directory is in the current user’s profile (CURRENTUSER\AppData\Roaming\D# Engine\). This is to support the use case where several developers work on the same machine. If you have installed the software previously using the installer, you can choose to either upgrade your existing installation or create a new installation that will co-exist on your drive alongside previous versions. You may want to have several active installations if you are working with several customer solutions and not all of them will immediately be updated to the current version.
You should run the installation program with the Run as Administrator command, if possible. Some installation operations (overwriting executable files, creating subdirectories) may be dependent on the credentials used when installing. For example, you might end up with an installation with updated scripts but unchanged executable if you are upgrading on top of an existing installation without the correct credentials.
The installer does not recognise installations of versions older than 4.2.0, so these will not be overwritten and will continue to work alongside the new installation.
Possible Installation Structure
If you are working with multiple projects, we suggest you install new major a.*.* as well as minor a.b.* versions in parallel subdirectories, and upgrade all a.b.* versions on top of their respective a.b installation. So you may end up with the following installations:
CURRENTUSER\AppData\Roaming\D# Engine\4_0 (new installation with 4.0.0, then upgraded to 4.0.1)
CURRENTUSER\AppData\Roaming\D# Engine\4_1 (new installation with 4.1.0, then upgraded to 4.1.1 and 4.1.2)
CURRENTUSER\AppData\Roaming\D# Engine\4_2 (new installation with 4.2.0, then upgraded to 4.2.1)
CURRENTUSER\AppData\Roaming\D# Engine\5_0 (new installation, to be upgraded with 5.0.* versions)
You may uninstall old versions once all projects have been upgraded beyond that version.
Licenses
The required license file is distributed to the client by the D♯ License Server cloud service, which the client queries on startup. The licenses are personal, and after each new installation to a new location (same or different computer) there is a one-time authentication process based on the user’s email address. Each user may have several valid licenses assigned to them on the server, for use with different customer projects and targets.
If the email address used during the authentication process is not registered on the License Server, or there are no valid licenses registered to the authenticated email address, D♯ Engine will not work. If this happens, contact your D♯ Administrator.
If there is no internet connection, D♯ Engine will use the license file(s) acquired during the last successful connection to the License Server for a limited time, so occasional internet connection problems will not stop D♯ Engine from working.
Post-Installation Steps to Get D♯ Engine Up & Running
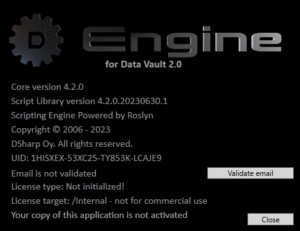
When running D♯ Engine the first time, you need to authenticate yourself against the License Server. Start the authentication process by clicking the Validate email button.
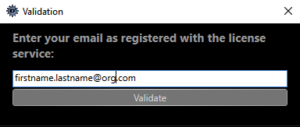
Then write your email address and press Validate. An email with a one-time PIN code is sent to the provided email address. Note: this requires the email address to be registered on the License Server.
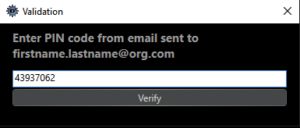
Copy the PIN code to the next step and press Verify.
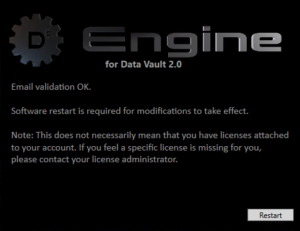
After verification a restart of D♯ Engine is required.
After the restart, if there are no licenses available to you, you will only get to the About D♯ information box stating this fact. In this case, contact your D♯ Administrator to get yourself a valid license.
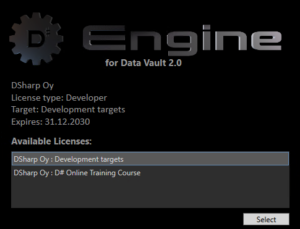
If there is only one valid license registered to you on the License Server, D♯ Engine activates that license and starts up. In case there are several licenses available to you, you will be provided a list of licenses to select from. Select one of the provided licenses to proceed. Be careful to select the license that corresponds to the target that you will be working on.
As the last step you will need to agree to the conditions of the license agreement.
Versions Older Than 4.2.0
Installation And License
The zip archive contains the ready-to-go executable file structure except for the target specific license file, which you will need to request after installation. When performing the installation for the first time, simply unzip the contents of the zip archive to where you want the D♯ Engine application to reside, typically in the D♯ Engine folder you create in the Program Files folder.
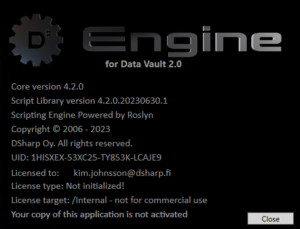
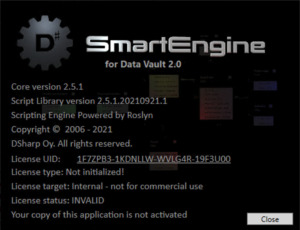
A license file is required to run the D♯ Engine software. If the file is missing or invalid, running the executable brings up the About box informing you about this:
To request a license file, click the underlined UID to copy it to the clipboard and paste it to a license request email addressed to devsupport(at)dsharp.fi. Alternatively, if your computer is correctly configured for the mailto: command, you can right-click the UID for a pre-formatted email. Remember to include the License target name to the request as well.
You will get a file called License.lic in a return email. Save this file into the D♯ Engine\bin folder where the D♯ Engine.exe executable is located.
In its status bar, D♯ Engine will remind you to renew your license, starting 30 days before it expires.
Version Upgrade
Because of the architecture of the D♯ Engine application, you cannot just unzip a newer version of the application directly on top of an old installation. This is because the actual functionality is implemented as script files residing in the Workspace\Scripting subfolder, and the script files may move and regroup within the Scripting subfolder between versions. Hence, a simple copying of files may result in the same script file being in two places at the same time, which leads to a situation where the code does not compile when D♯ Engine is started and it fails to initialize properly. So when upgrading to a newer version, always delete the current Workspace\Scripting subfolder before unzipping the newer version onto the older one.
Multiple Installations
If you plan to have multiple installations, use the D♯ Engine folder as a common root folder for the target-specific installations. In this common folder you will create subfolders for each client you are building the DW for (D♯ Engine\Client 1, D♯ Engine\Client 2 etc). Each of these may contain different versions of D♯ Engine, depending on which version of D♯ Engine the client project is using. This way, not all clients need to upgrade their D♯ Engine versions at the same time.
If your organization uses D♯ Engine to develop for multiple clients, or if you just have several developers, a good solution for keeping things synchronized is to set up a git-based internal delivery system. In this scenario, one person will update the master with the latest version, which can be rolled out once an upgrade decision has been made in a project. Then all persons working for that particular project can update their versions with a simple press of a button. Git will very conveniently handle any case of scripting files moving around all over the place.